I wanted to have my iPhone communicate with my LoPy4 via bluetooth, which I did successfully, so I decided I’d document how I did it here. This post is the second part of that process – building the iOS app.
I’d like to start out by thanking Jared Wolff for his article The Ultimate How-to: Build a Bluetooth Swift App With Hardware in 20 Minutes that provided me the foundation for this project/article. He used a Particle Mesh board instead of a Pycom board so I modified things to suit that different environment. He also has some excellent explanations so if what I say isn’t clear feel free to reference his article as well. With that all said – let’s get started!
New Xcode Project
The first thing you are going to need is Xcode, which is used to develop iOS applications, and is available from the App Store.
In Xcode choose to File -> New -> Project.
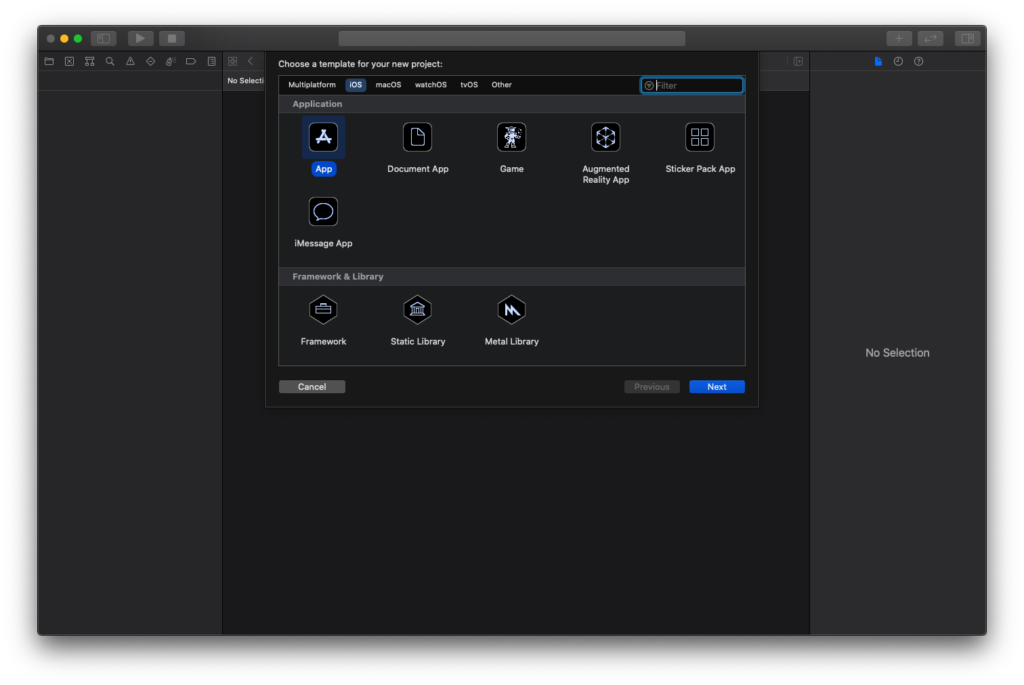
Choose iOS and App then click Next
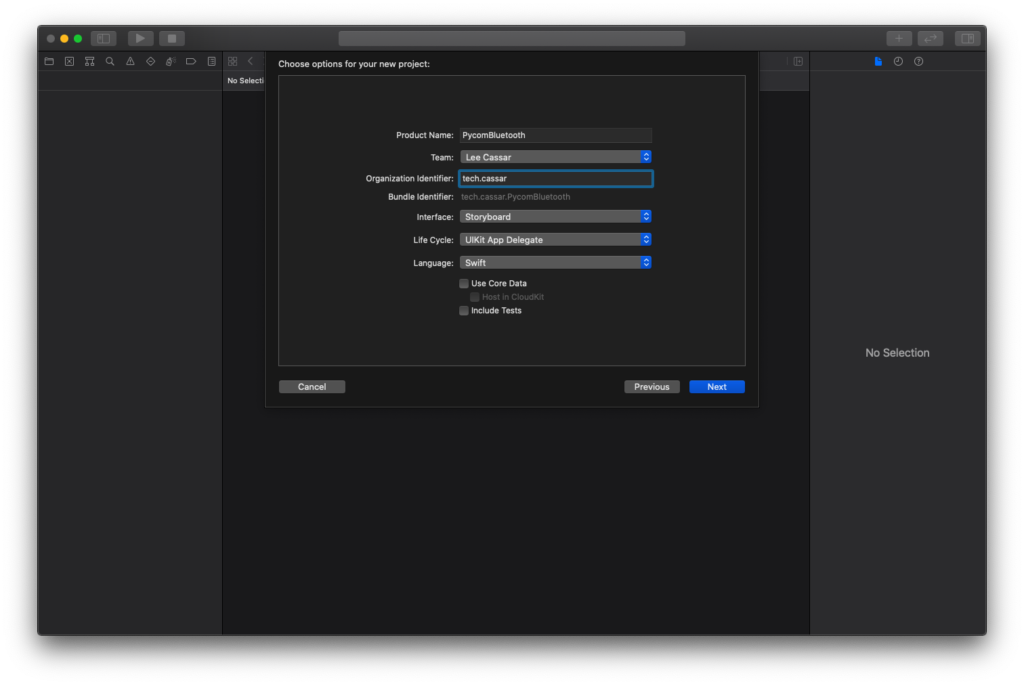
Enter a Project Name and an Organization Identifier. I called mine PycomBluetooth with tech.cassar as the organization identifier. Pick something to suit you!
Be sure to set your Interface to Storyboard and your Language to Swift as I did in the above screenshot.
Click Next.

Choose a location to save your project and click Create.
Find and open your Info.plist file.
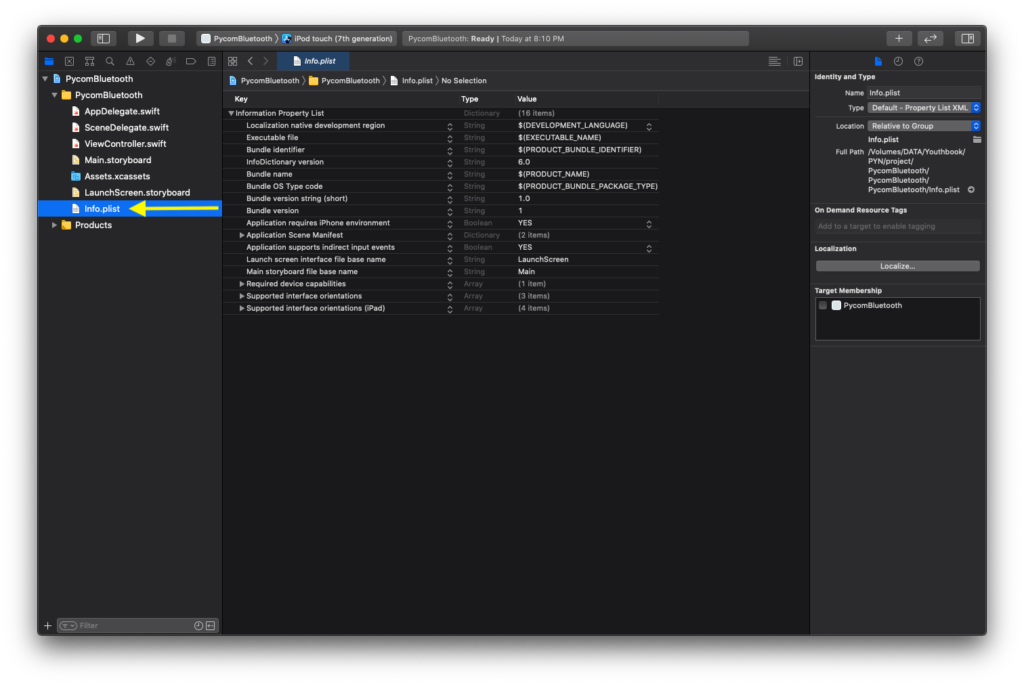
We’ll be adding two different entries into the Info.plist file which are required by Apple to explain to the application user why your application needs access to Bluetooth.
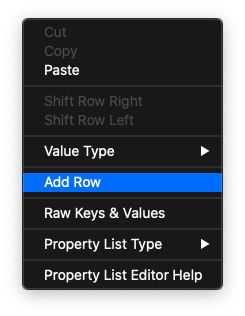
To add a new entry into the Info.plist file you’ll need to right-click and choose Add Row.
The first type we are going to add is Privacy – Bluetooth Always Usage Description. Click on the new line you created and find that description in the list.
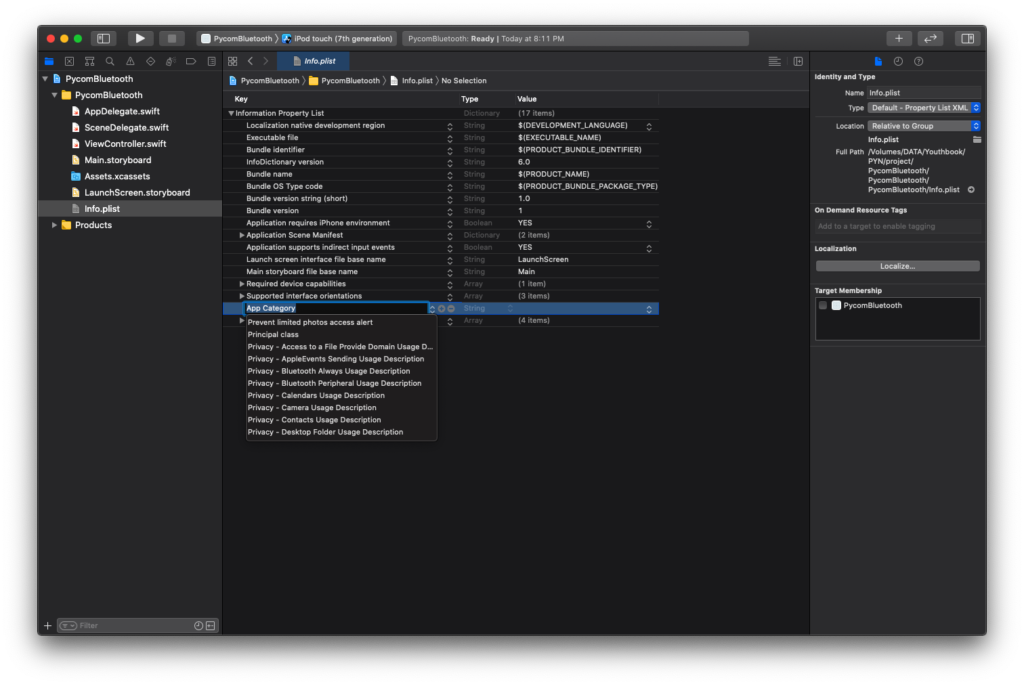
Set the value of that entry to something like This app uses Bluetooth to connect to the Pycom development board.
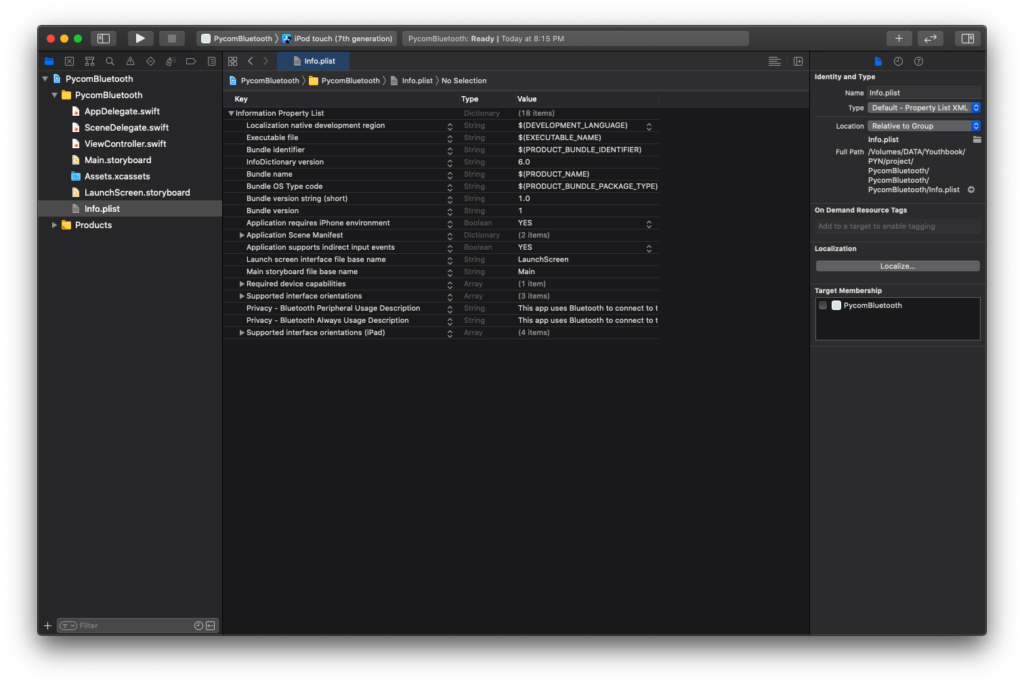
Repeat the process by adding another new line and choose Privacy – Bluetooth Peripheral Usage Description this time. Again set the value to This app uses Bluetooth to connect to the Pycom development board, or something similar.
Let’s Start Coding
Pretty much everything we are going to be doing will be in the ViewController.swift so start by opening it up.
First we need to import CoreBluetooth.
import CoreBluetoothThis allows us to work with the Bluetooth Low Energy functionality in iOS.
We then need to add CBCentralManagerDelegate and CBPeripheralDelegate to the ViewController class.
class ViewController: UIViewController, CBCentralManagerDelegate, CBPeripheralDelegate {We now create local variables to store the central manager and peripheral.
var centralManager: CBCentralManager!
var myPeripheral: CBPeripheral!
We might as well add the variables to store each of the three characteristics now too.
var redChar: CBCharacteristic?
var greenChar: CBCharacteristic?
var blueChar: CBCharacteristic?
In the viewDidLoad function, let’s init the centralManager.
centralManager = CBCentralManager(delegate: self, queue: nil)Setting delegate: self is important as without it the central manager won’t change state on startup.
Next we will create a few more variables that store the various UUID’s that we will need when communicating with the Pycom board.
// The various UUIDs we need
let pycomLEDServiceUUID = CBUUID.init(string: "36353433-3231-3039-3837-363534333231")

let redLEDCharacteristicUUID = CBUUID.init(string: "36353433-3231-3039-3837-363534336261")

let greenLEDCharacteristicUUID = CBUUID.init(string: "36353433-3231-3039-3837-363534336262")

let blueLEDCharacteristicUUID = CBUUID.init(string: "36353433-3231-3039-3837-363534336263")
Bluetooth
Bluetooth is event based and we’ll be creating functions to handle those events. The first one is centralManagerDidUpdateState.
func centralManagerDidUpdateState(_ central: CBCentralManager) {
        if central.state == CBManagerState.poweredOn {
            // Turned on
            print("BLE powered on")

            central.scanForPeripherals(withServices: [pycomLEDServiceUUID], options: [CBCentralManagerScanOptionAllowDuplicatesKey : true])
        }
        else {
            // Bluetooth is not on due to some issue
            print("Something is wrong with BLE")
        }
    }
It first checks to determine if Bluetooth is on or not. If it’s on then we scan for a Bluetooth device advertising the pycomLEDServiceUUID that we defined earlier.
Note: If you change the scanForPeripherals to (withServices: nil … it will find all Bluetooth devices in range.
Next comes centralManager didDiscover:
func centralManager(_ central: CBCentralManager, didDiscover peripheral: CBPeripheral, advertisementData: [String : Any], rssi RSSI: NSNumber) {

        if let pname = peripheral.name {

            // Check if this is the peripheral we want and
            // if so stop any further scanning and connect
            if pname == "CassarTech" {
                self.centralManager.stopScan()

                self.myPeripheral = peripheral
                self.myPeripheral.delegate = self
                self.centralManager.connect(peripheral, options: nil)
            }
        }
    }
This is executed when the scan finds a device. Within it we check if the device it found has the name we are expecting- which in my case is CassarTech. Once we find the device we are looking for we can stop scanning for other devices, store it and connect to it.
Then we move onto centralManager didConnect:
func centralManager(_ central: CBCentralManager, didConnect peripheral: CBPeripheral) {
        // If we have successfully connected to our peripheral device then we can now discover
        // if our required service UUID is available on it and if so try to connect to it
        if peripheral == self.myPeripheral {
                        print("Connected to your Pycom Board")
                        peripheral.discoverServices([pycomLEDServiceUUID])
                    }
    }
This code runs once the device is connected. After we get connected we then can discover the services and characteristics that are available on the device. In the above code we are specifically looking for the UUID of the LED service running on the Pycom board.
We then move onto peripheral didDiscoverServices. (Notice that we’ve switched from centralManager to peripheral now that we’ve gotten connected)
func peripheral(_ peripheral: CBPeripheral, didDiscoverServices error: Error?) {
        if let services = peripheral.services {
            for service in services {
                if service.uuid == pycomLEDServiceUUID {
                    print("** Pycom LED Service FOUND **")
                    peripheral.discoverCharacteristics([redLEDCharacteristicUUID, greenLEDCharacteristicUUID, blueLEDCharacteristicUUID], for: service)
                    return
                }
            }
        }
    }
In this code we loop through the available services looking for the UUID we’ve stored in pycomLEDServiceUUID. When we find that UUID we log a message to the console to indicate that we’ve found the service. Then we kick off the characteristics discovery process. We feed the characteristics discovery process the UUID’s of the three characteristics we are looking for to limit the scope of what it searches for.
Now finally we get to peripheral didDiscoverCharacteristicsFor as the final piece in this discovery sequence.
func peripheral(_ peripheral: CBPeripheral, didDiscoverCharacteristicsFor service: CBService, error: Error?) {
        if let characteristics = service.characteristics {
            for characteristic in characteristics {
                if characteristic.uuid == redLEDCharacteristicUUID {
                    print("** RED CHARACTERISTIC FOUND **")
                    redChar = characteristic
                }

                if characteristic.uuid == greenLEDCharacteristicUUID {
                    print("** GREEN CHARACTERISTIC FOUND **")
                    greenChar = characteristic
                }

                if characteristic.uuid == blueLEDCharacteristicUUID {
                    print("** BLUE CHARACTERISTIC FOUND **")
                    blueChar = characteristic
                }
            }
        }
    }
This function loops through each of the discovered characteristics, comparing UUIDs to the ones we have stored in our variables, and lets us know when each of the three characteristics has been found. When a characteristic is found we store it in the appropriate it variable. (e.g. blueChar for the blue characteristic)
Test Run
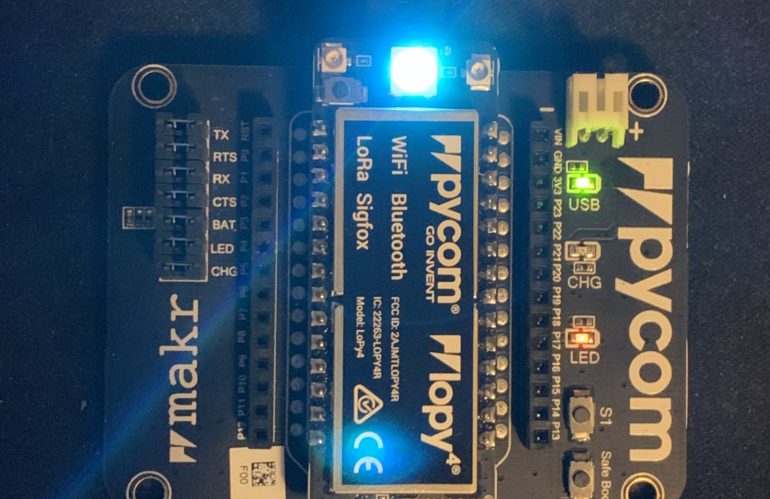
We’ve reached a point where we can do a test run of the app. The app itself won’t display anything except a black screen but we should be able to see the results of our print statements in Xcode as well as see a connection message on our Pycom board, assuming it’s hooked up to Atom with the Pymakr plugin running.
So start by connecting your iOS device to your computer and at the top of Xcode select it as the target as shown in the images below. You’ll see my iPhone, which is named Neuromancer, at the top of the list.
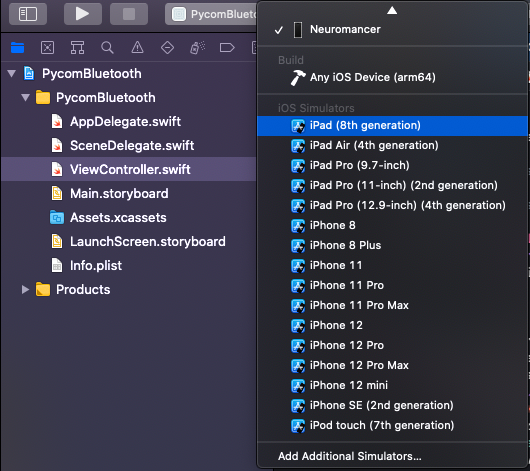
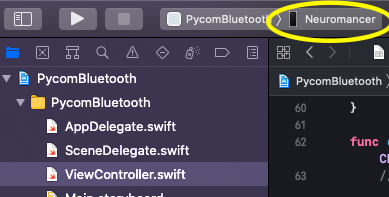
Once you have selected your iOS device click the Play button (also shown in the above images) to run your code on the iOS device.
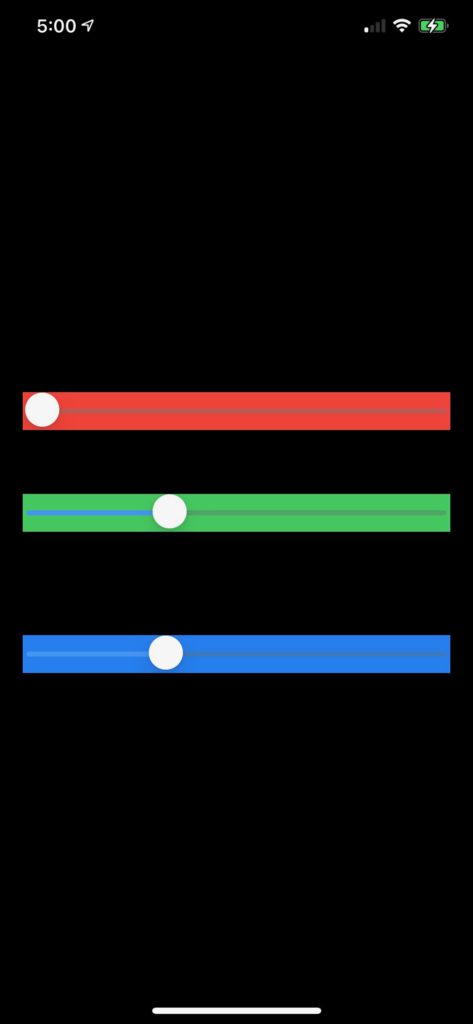
Assuming everything goes well you should notice your iOS device screen go black. It will then pop up with a request to allow the app to use Bluetooth which, of course, you’ll want to allow.
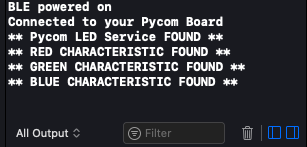
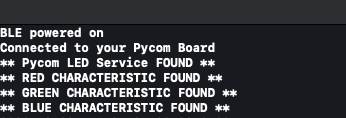
Once you’ve allowed Bluetooth, and assuming you have your Pycom device running the code from the previous article, you should see some messages in Xcode that look like this:
You should also see a Client connected message in your Pymakr plugin window.
Congratulations – you’ve connected from your iOS device to your Pycom board! Now let’s add some additional functionality in the app to let you control the onboard LED via Bluetooth.
Adding Sliders
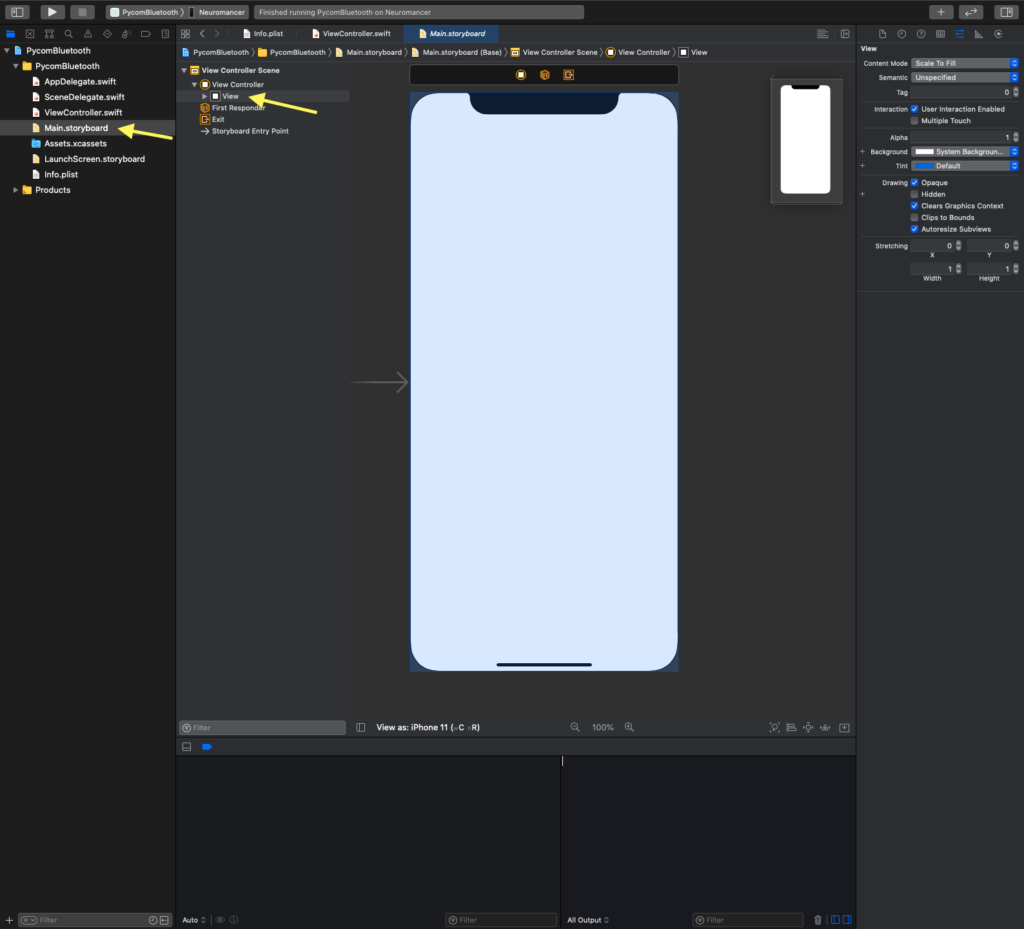
Now we are going to add slider controls to our Main.storyboard. Open the Main.storyboard and click on the View under View Controller as shown in the image below.
Now click the Library button. It looks like a + sign and is at the top right area of Xcode.
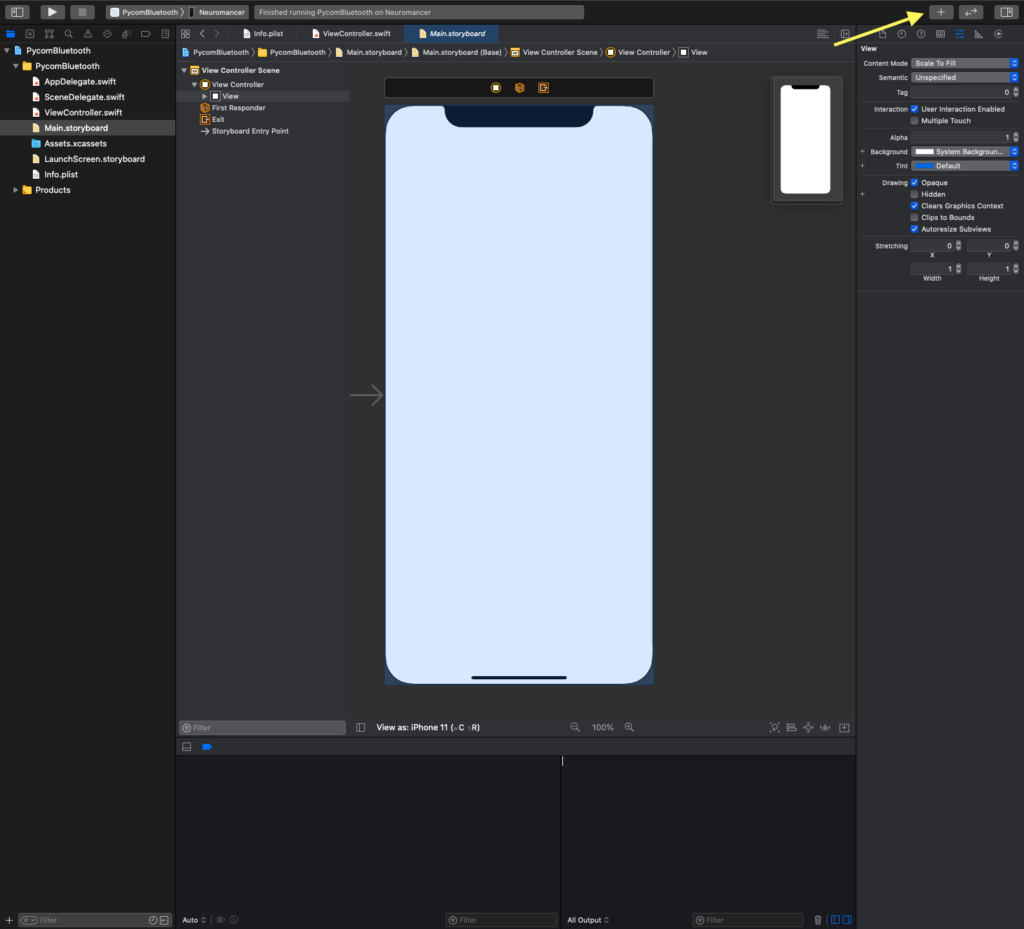
You’ll get a pop-up with all the different choices you can insert into your app.
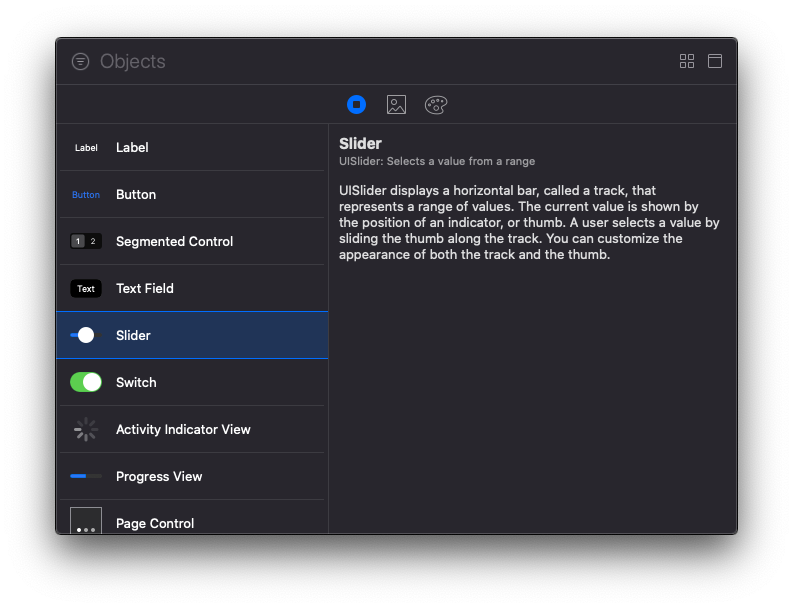
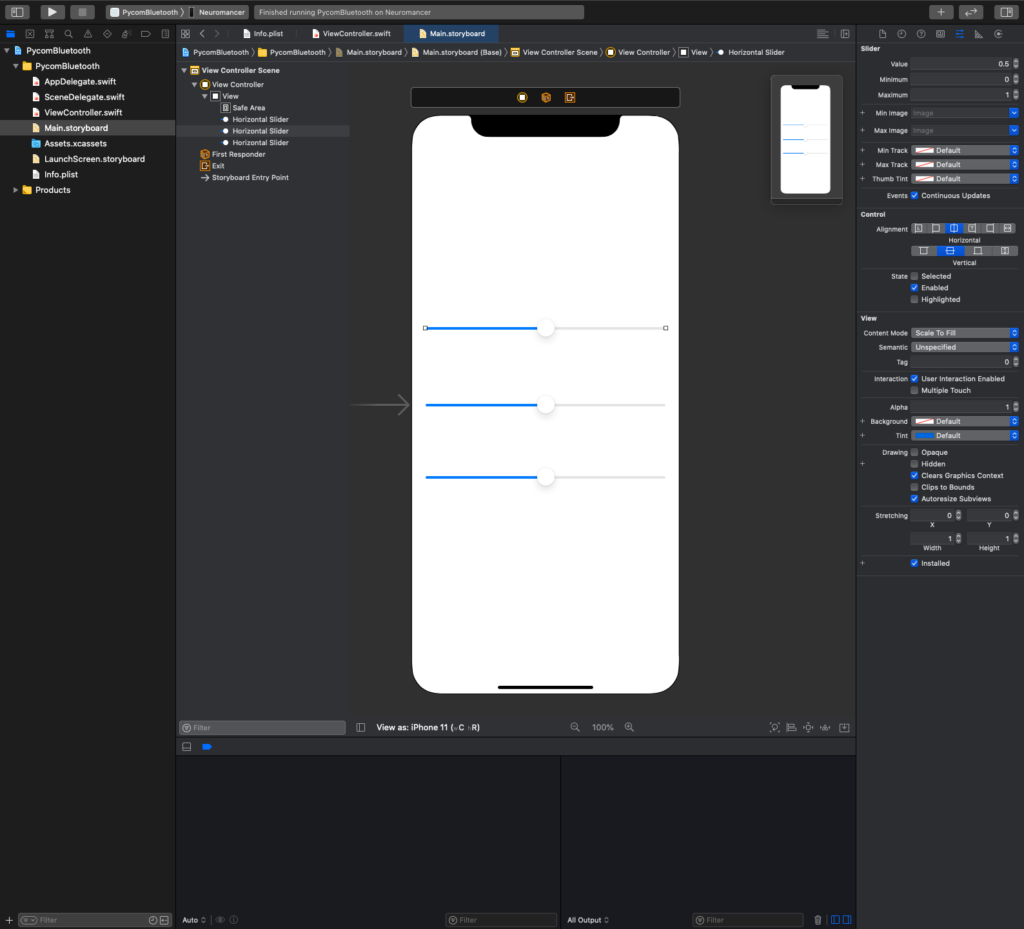
Drag three Sliders to your view. If you click and hold you’ll notice some handy alignment tools. Use those to help you position the sliders centered within the view. I have also expanded the slider width which you are welcome to do as well.
Once you have the sliders in place you’ll want to change the background colour of each slider to show what colour it is controlling. To do this click on the slider, then click on the Attributes Inspector. You’ll see Background which can be changed to suit our needs.
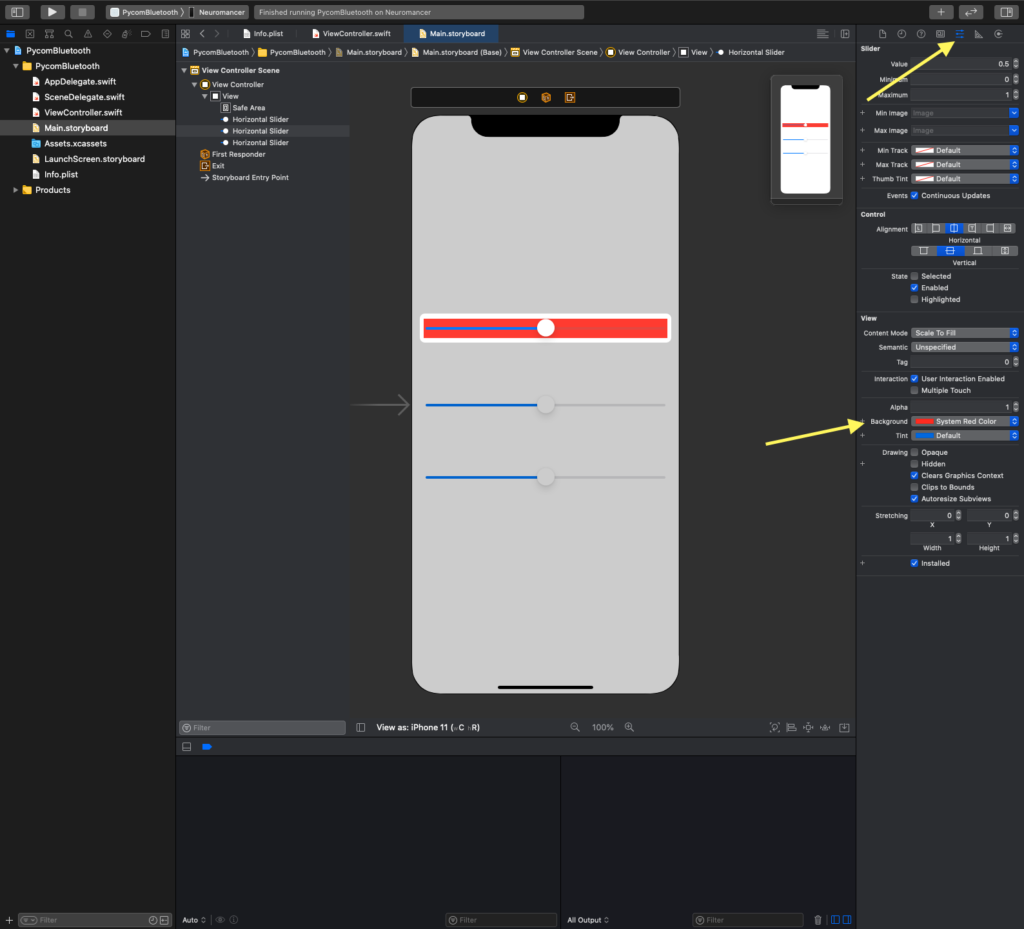
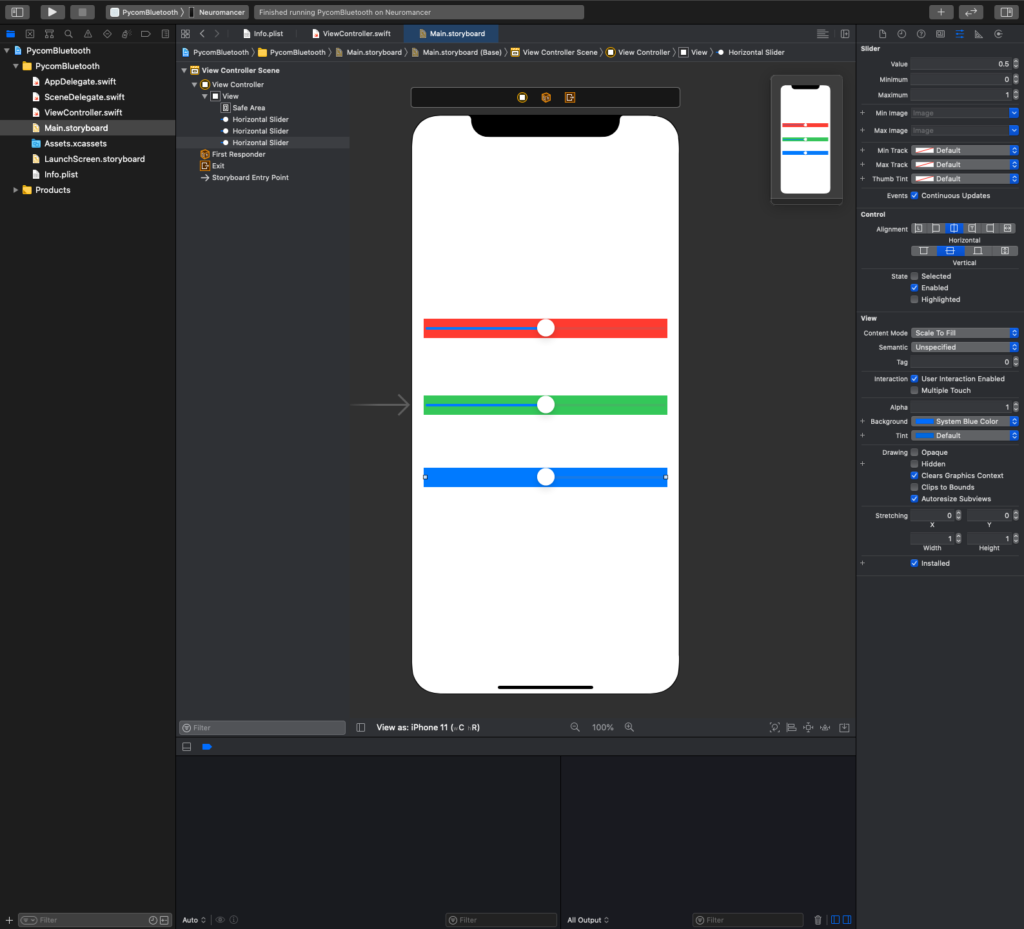
Make the top slider System Red, the middle one System Green and the bottom one System Blue.
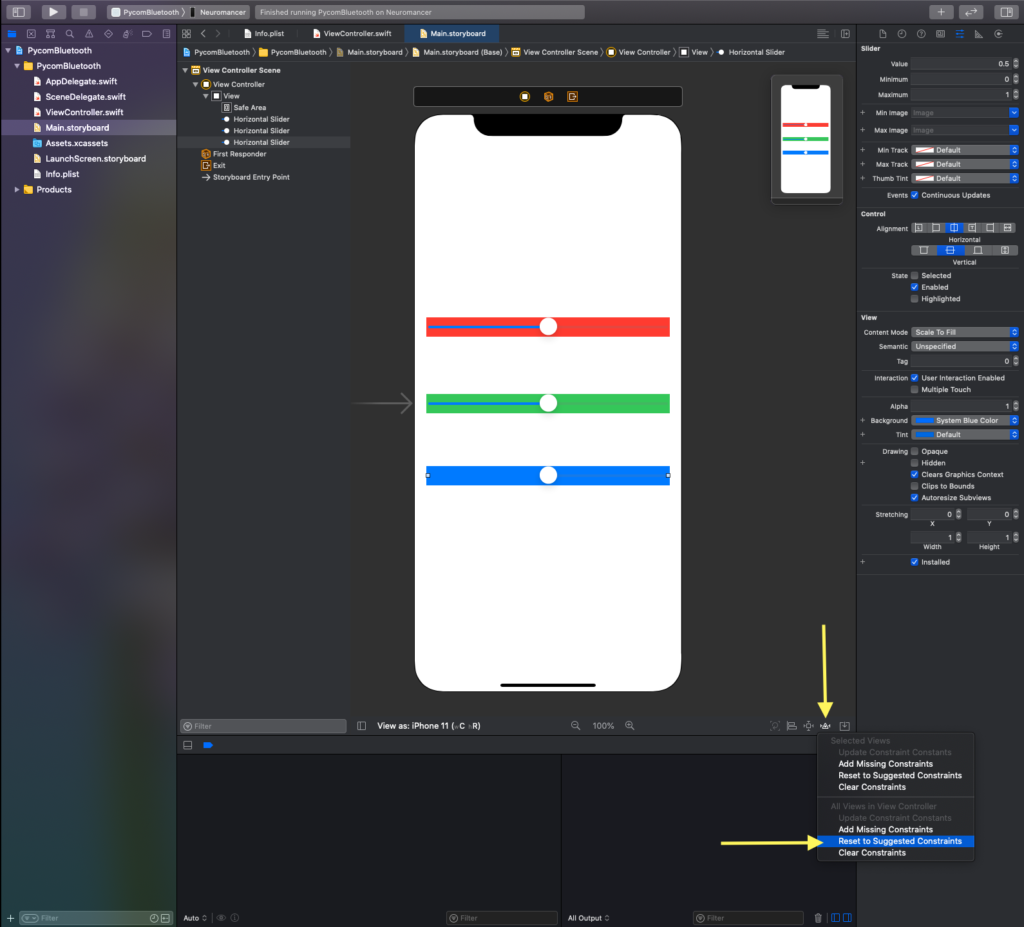
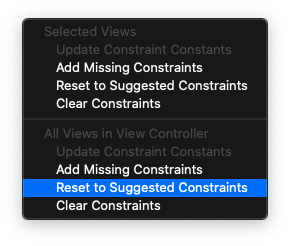
Now to make sure the sliders stay where we want them click on the Resolve Auto Layout Issues (towards the bottom right) and select the 2nd Reset to Suggested Constraints.
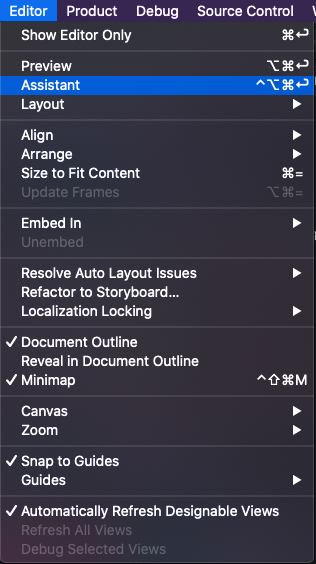
Now it’s time to link our sliders with our code by opening the Assistant Editor. Go to the Editors menu and choose Assistant.
This will split your screen between showing the Main.storyboard and your ViewController.swift.
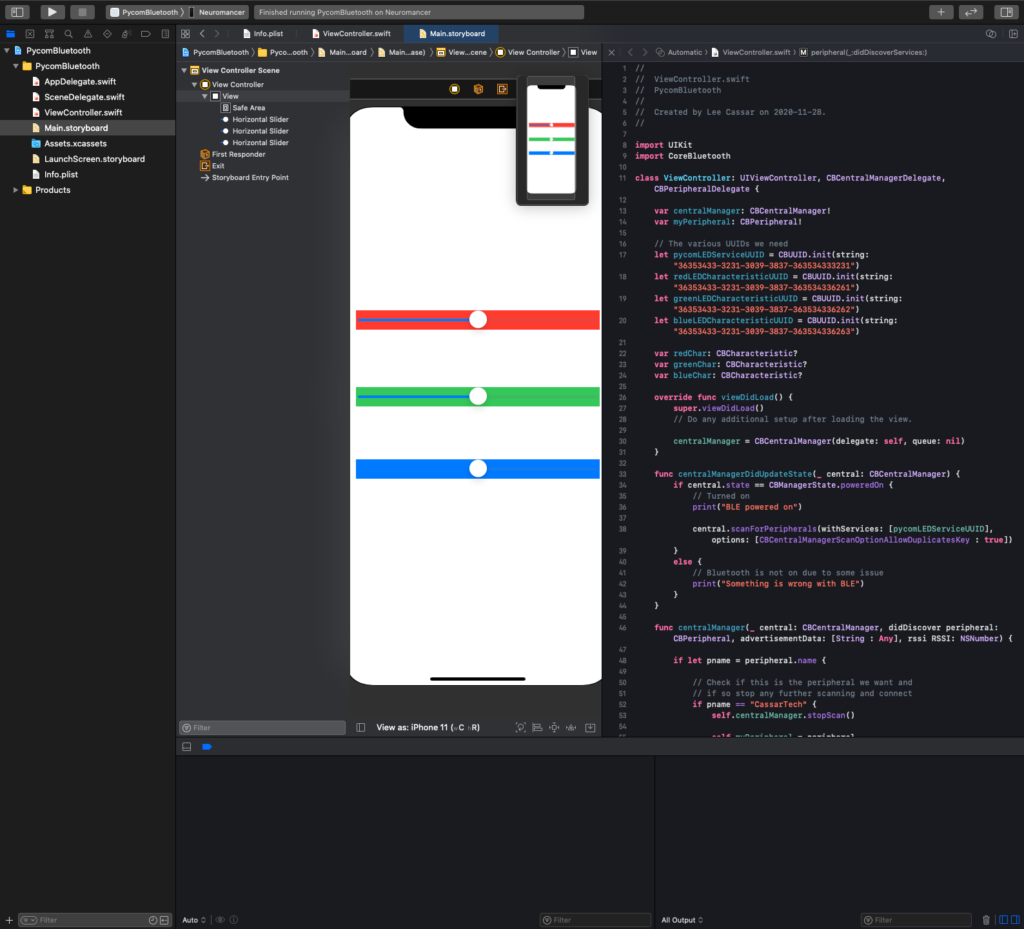
Note: Make sure the ViewController.swift is open in the Assistant Editor.

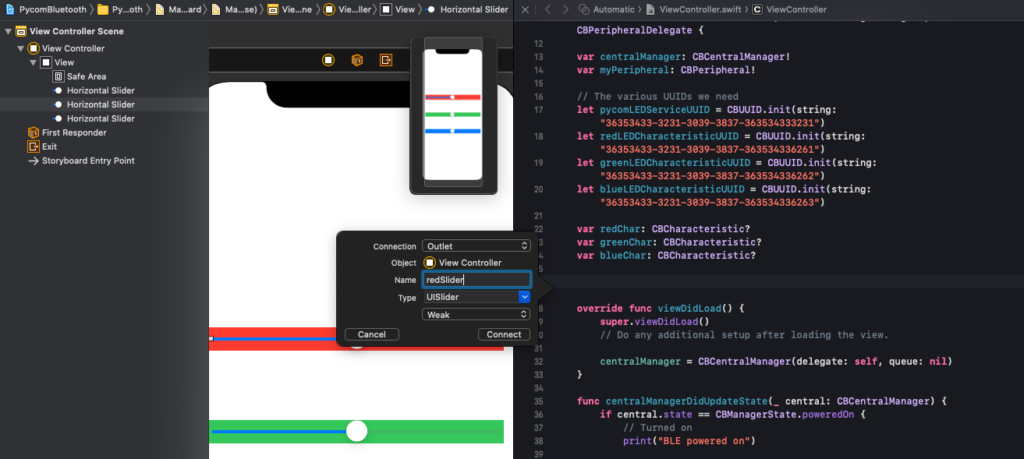
Underneath your Characteristics variables near the top of your code Right-Click and drag from the Red Slider into your code. I named mine redSlider and it’s of type UISlider.
This will create an @IBOutlet line that looks like this:
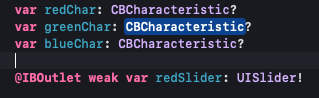
Repeat the process for the other two sliders naming them greenSlider and blueSlider.

This will allow us access to the values of each of the sliders.
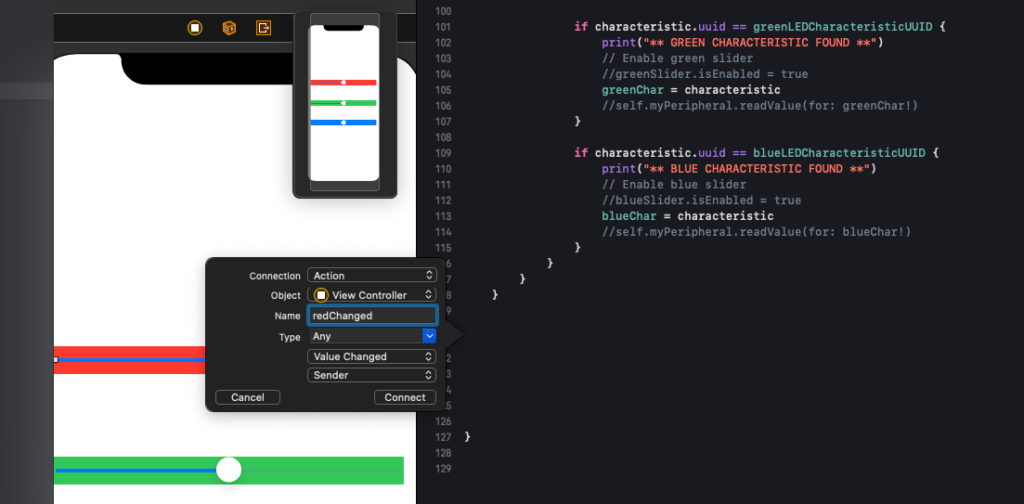
Next we need to attach the Value Changed event to each of the sliders. Let’s put these after our peripheral function. Once again Right-Click and drag from your red slider into your code, this time making the Connection an Action called redChanged of the type Value Changed.
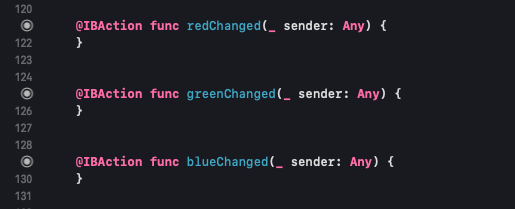
This will create a bit of code that looks like this:

Repeat the process for the green and blue sliders creating actions called greenChanged and blueChanged.
You’ll also want to make a couple other changes to your sliders. Make sure you have the Attribute Inspector open and click on the red slider. Uncheck the Enabled checkbox, as we will enable that later in the code. As well change the Maximum value to 255 and the Value to 0. Finally I like to disable Continuous Updates to not flood the Pycom with changes as I drag the slider – it only sends the final value this way.
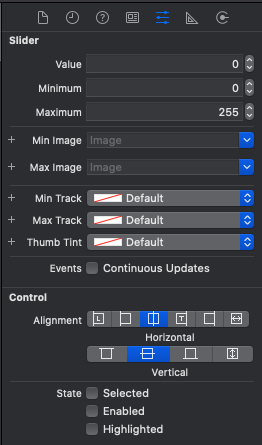
Repeat the process for the other two sliders as well.
Now let’s go back to the didDiscoverCharacteristicsFor function as we will want to enable each slider as the associated characteristic is discovered.
// Enable the red slider
redSlider.isEnabled = true
Once completed your didDiscoverCharacteristicsFor should look like this:
func peripheral(_ peripheral: CBPeripheral, didDiscoverCharacteristicsFor service: CBService, error: Error?) {
        if let characteristics = service.characteristics {
            for characteristic in characteristics {

                if characteristic.uuid == redLEDCharacteristicUUID {
                    print("** RED CHARACTERISTIC FOUND **")

                    redChar = characteristic
                    redSlider.isEnabled = true
                }

                if characteristic.uuid == greenLEDCharacteristicUUID {
                    print("** GREEN CHARACTERISTIC FOUND **")

                    greenChar = characteristic
                    greenSlider.isEnabled = true
                }

                if characteristic.uuid == blueLEDCharacteristicUUID {
                    print("** BLUE CHARACTERISTIC FOUND **")

                    blueChar = characteristic
                    blueSlider.isEnabled = true
                }
            }
        }
    }
Next let’s update the functions redChanged, greenChanged and blueChanged to update the appropriate characteristic.
    @IBAction func redChanged(_ sender: Any) {
        let slider:UInt8 = UInt8(redSlider.value)
        self.myPeripheral.writeValue(Data([slider]), for: redChar!, type: .withResponse)
    }

    @IBAction func greenChanged(_ sender: Any) {
        let slider:UInt8 = UInt8(greenSlider.value)
        self.myPeripheral.writeValue(Data([slider]), for: greenChar!, type: .withResponse)
    }

    @IBAction func blueChanged(_ sender: Any) {
        let slider:UInt8 = UInt8(blueSlider.value)
        self.myPeripheral.writeValue(Data([slider]), for: blueChar!, type: .withResponse)
    }
First we get the value of the slider, which is a value from 0 to 255, and then we use myPeripheral.writeValue to send the value of the slider to the appropriate characteristic. This sends the value to the Pycom board over Bluetooth to the proper characteristic.
Now to keep things clean we need to handle when Bluetooth gets disconnected which we do in centralManager didDisconnectPeripheral.
func centralManager(_ central: CBCentralManager, didDisconnectPeripheral peripheral: CBPeripheral, error: Error?) {
        if peripheral == self.myPeripheral {
            print("Disconnected")

            // Disable sliders if we are not connected
            redSlider.isEnabled = false
            greenSlider.isEnabled = false
            blueSlider.isEnabled = false

            // Reset the sliders back to 0
            redSlider.value = 0
            greenSlider.value = 0
            blueSlider.value = 0

            self.myPeripheral = nil

            // Start scanning again
            centralManager.scanForPeripherals(withServices: [pycomLEDServiceUUID], options: [CBCentralManagerScanOptionAllowDuplicatesKey : true])
        }
    }
We start by logging to the console that it has been disconnected. We disable the sliders and set them back to their default value of 0. We clean up the myPeripheral variable by resetting it to nil, as well. Finally we start scanning again to allow us to re-connect when it’s available.
One Last Thing
As one final addition to this app I’d like to add the ability to read the status of the characteristics from the Pycom device to allow the sliders to be back at the right setting if we are disconnected and then re-connected to the Pycom device.
To do this isn’t difficult. First we are going to read the value of the characteristics upon discovery by using myPeripheral.readValue in the peripheral didDiscoverCharacteristicsFor function.
// Initiate a read from the red characteristic
self.myPeripheral.readValue(for: redChar!)
Here is the updated function:
func peripheral(_ peripheral: CBPeripheral, didDiscoverCharacteristicsFor service: CBService, error: Error?) {
        if let characteristics = service.characteristics {
            for characteristic in characteristics {

                if characteristic.uuid == redLEDCharacteristicUUID {
                    print("** RED CHARACTERISTIC FOUND **")

                    redChar = characteristic
                    redSlider.isEnabled = true
                    self.myPeripheral.readValue(for: redChar!)
                }

                if characteristic.uuid == greenLEDCharacteristicUUID {
                    print("** GREEN CHARACTERISTIC FOUND **")

                    greenChar = characteristic
                    greenSlider.isEnabled = true
                    self.myPeripheral.readValue(for: greenChar!)
                }

                if characteristic.uuid == blueLEDCharacteristicUUID {
                    print("** BLUE CHARACTERISTIC FOUND **")

                    blueChar = characteristic
                    blueSlider.isEnabled = true
                    self.myPeripheral.readValue(for: blueChar!)
                }
            }
        }
    }
So you may be thinking to yourself – where do I get the value for that characteristic so I can set my slider values? The answer is that we need to add one more function – peripheral didUpdateValueFor.
func peripheral(_ peripheral: CBPeripheral, didUpdateValueFor characteristic: CBCharacteristic, error: Error?) {

        guard let data = characteristic.value else {
            return
        }

        // Determine which characteristic is returning the value
        // and set the value of the appripriate slider
        if (characteristic.uuid == redLEDCharacteristicUUID) {
            redSlider.value = Float(data[0])
        } else if (characteristic.uuid == greenLEDCharacteristicUUID) {
            greenSlider.value = Float(data[0])
        } else if (characteristic.uuid == blueLEDCharacteristicUUID) {
            blueSlider.value = Float(data[0])
        }
    }
What I’ve done is store the data received during the read in the data variable. Then to determine which characteristic it applies to I compare the characteristic.UUID to the UUID’s stored in our variables. So if the characteristic.uuid equals the value of the greenLEDCharacteristicUUID I can assign the data value to the greenSlider.value. Note that I need to convert the received value to a Float as that is what the slider is expecting.
Final Test
It’s time to test this all out! Hook your iOS device back up to your computer and hit the Play button again in Xcode to build and run your app.
You should again see these messages in Xcode:
But now you should be able to move those sliders and adjust the colour of the onboard LED!
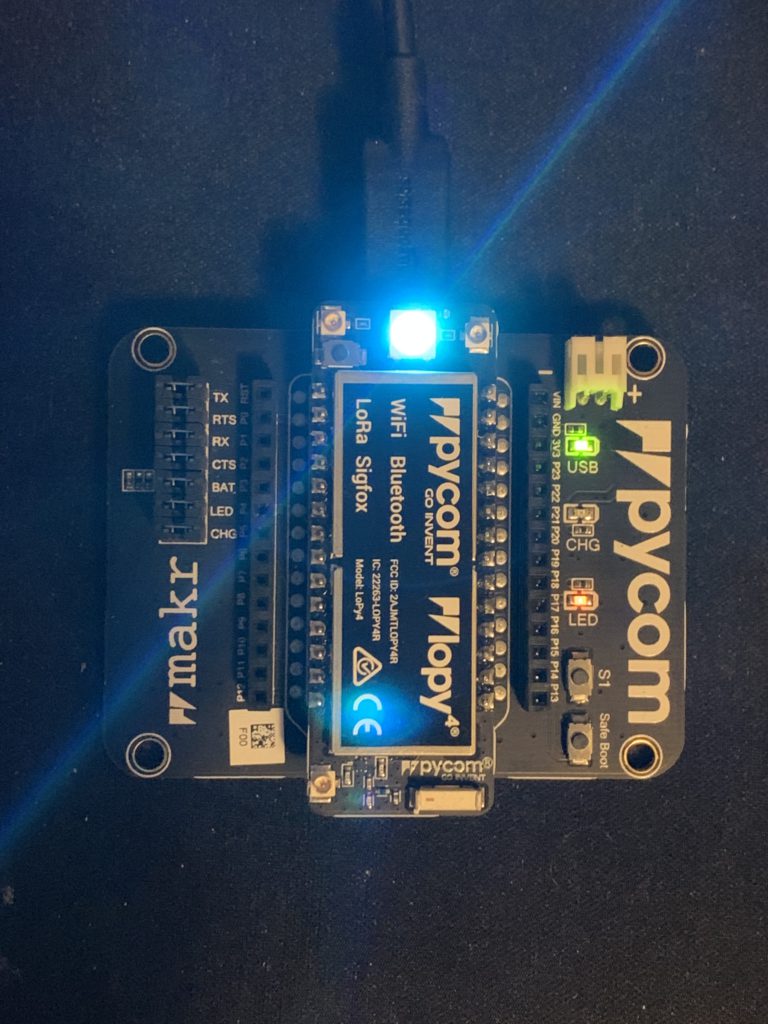
If your Pycom device is still up with Atom and Pymakr you’ll also see additional messages on the console showing the read and write requests.
Summary
In this article you’ve learned how to connect a #Pycom development board to an iOS device using Bluetooth. You learned how to send and receive data from multiple characteristics and made a simple interface to do so.
As you can tell there is a lot to know about Bluetooth on iOS and we just scratched the surface of that knowledge. Stay tuned for future articles delving more into Bluetooth on iOS and Pycom!